P5 and P6: Cinematic Lighting Techniques and Manipulating Camera Settings to Record Cinematic Footage
Get link
Facebook
X
Pinterest
Email
Other Apps
P5 and P6: Cinematic Lighting Techniques and Manipulating Camera Settings to Record Cinematic Footage
In this report, I will demonstrate how we have cinematic techniques and mise en scene to record our music video. Our music video is for the song Nightmare by Set It Off. This song falls into the pop punk music genre so we have reflected this in our rushes.
Here you can see a selection of rushes that we recorded for our music video.
Explanation of Camera Settings
There are lots of settings you will need to be aware of to ensure
your photo/video in the best quality possible. The main camera settings
are: Frame rate, Shutter speed, ISO, Aperture and white balance. All of
these settings effect each other so it is important that you change each
setting accordingly. The area/setting in which you use your camera will
change what levels you will need to have your camera settings on.
Frame
rate is how many frames the camera takes in a second. This is usually
24fps in the media industry (animation, film and TV...). The higher the
FPS, the slower your video will become since the camera is taking more
photos in that second. This is usually used at around 60-120 FPS. Movies
use this slow motion effect to show action slowed down or show a
character in distress/about to faint.
Your shutter speed must be
about twice the speed of your frame rate to ensure that your video will
look natural. Shutter speed controls how long the camera is exposed to
light. The lower the shutter speed, the more motion blur there is and
the lighter the footage is. The higher the footage speed (less light
goes in the camera so it is darker) the less motion blur.
ISO
refers to how the camera sensor is sensitive to light. The lower your
ISO, the darker your footage and there will be less grain. However, if
you used a high ISO, your footage may be lighter, but the footage will
be very grainy and static like.
Aperture controls how much light
you let into the camera. The higher the aperture number, the less light
is let into the camera and the background will be in focus. The lower
the aperture number, the lighter the footage and this increases
background blur. Aperture is measured in F. Stop.
White balance is
used to make sure the colours are correct in different lighting. If
white balance isn't used, the colours could be warmer or cooler (red and
blue) than they are in reality. To have the correct white balance in an
enviroment you will need to use a white object in the scene, a piece of
paper or a white balance card. If the colour white is correct, then so
are all other colours. The lighting changes the colours of a setting
therefore you will need to recalculate the white balance depending on
your location.
Camera Settings and Lighting
For our music video, we decided we wanted it to be a hybrid (performative and illustrative). To help the audience differentiate the two different sections of our music video, we chose two different locations and outfit choices. For the illustrative section, we decided to film in the woods. For the performance chorus sections, we filmed in the lecture theater in our college. We filmed our music video using the Cannon 250D camera and two Ambiful FL80RGB lights.
In the rushes above, you can see that we filmed in daylight in the sun for the woods scenes. This was for general safety and to also make sure the video looks bright enough. We will probably decrease the brightness slightly in edit. We used standard ISO, Aperture and shutter speed for these scenes. This made sure that our video was bright enough and that the video wasn't blurred.
In the chorus scenes, we used two Ambiful FL80RGB lights. We decided to use two point lighting. Using these lights and the app, we could change the intensity and colour of the lights. We decided we wanted red lighting to fit pop punk genre conventions and to show how angry the character is. This also gave us a little bit of a chiaroscuro effect which is conventional for the genre. This means that half of the character's face is darker than the other side. This allows us to create an uneasy feeling for the audience. Camera wise, we used a lower ISO since the lighting was very bright. We turned the room lights off to make sure that the red lighting was the best it could be. We used standard aperture and shutter speed.
To conclude, I have explained how we used different lighting and camera settings to achieve a cinematic effect for our music video. You can see our evidence for this in our rushes above.
D2: Discuss How The Final Edit Has Complemented Recorded Cinematography Effects to Create Meaning In this report, I will explain how I have created meaning in my music video from the different editing techniques I used. Here is my final completed music video that I edited. This song is called Nightmare by the band Set It Off. I have applied a wide range of editing techniques to create our pop punk/rock music video. This genre of music is known to be a little dark. Below are some music videos that we used for inspiration. I will compare scenes from our music video to scenes from these professional music videos to show how we have followed genre conventions and created meaning. Better Without You- Evanescence In this music video, you can see Evanescence have used red lighting to symb...
P7: Apply Post-Production and Editing Techniques In this report, I will explain how I have edited our music video. I will show what effects and transitions I used to create the video and how I have exported it. This is my completed Nightmare music video. I edited this using Adobe Premiere Pro since this is a professional software that they would use to edit in the media industry. Here you can see I am setting up my Nightmare music video Premiere Pro file. As you can see, I haven't imported any folders or footage yet, I did this after creating the file by importing my media. Editing Techniques As you can see from the timeline, I have cut my footage down. Nightmare is a rock/punk song, it is fast paced and I used this to my advantage. I used th...
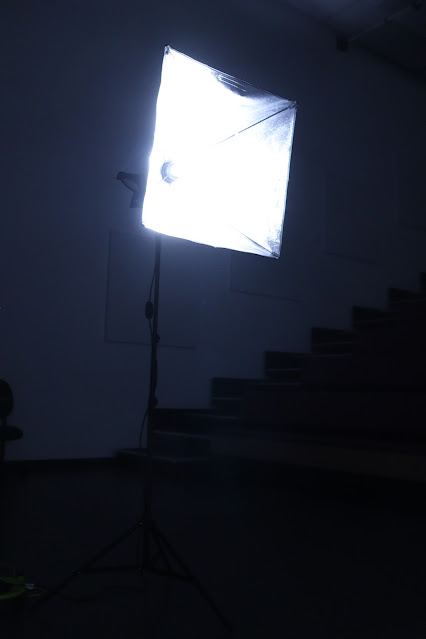
P3: Explain Different Lighting Settings In this report, I will discuss the different type of lighting that is available for us to use in our music video. I will also talk about the different lighting techniques we can produce and how they effect the enviroment and our emotions. Lighting Equipment Here you can see a softbox light with an LED bulb. This light has a plug that you need to connect to electrical ports. This makes it impossible to use this lighting outside, but it can be used inside. This is an LED light panel. This light is battery powered and needs to be attached to a tripod. This is ideal for outside lighting since you are not being limited to a plug socket unlike the softbox light. ...

Comments
Post a Comment